My resolutions are house based this year. We have been in the house nearly three years now and we’ve been putting off little projects to make this place a home for long enough.
This year I’d like to:
Paint the remaining rooms in the house. This includes the third bedroom, living room, and kitchen.
I don’t know if the kitchen will get finished because we’d really like to remodel it and we haven’t saved the money to tackle that project yet.
Decorate the walls with photographs and art.
We did start adding photos last year, but we have many more to add!
We also need to:
Add decorations like curtains or drapes. Update decor like throw pillows, lamps, framing photos.
Lastly:
Destash. Sell it, donate it, or trash it!
Of course, I’ll continue to have non-house related projects going on, but my focus this year is making a home. I’m certain I’ll be learning a lot about home decorating that I’ll be passing on to you this year.
It’s easy to forget all that you did in one year. After scrolling through my Facebook feed (and let’s face it, that’s the most comprehensive source) I’m impressed with what we’ve accomplished this year.
We travelled to Chicago. Though the reason was sad, the time spent with family was great. We had amazing pizza.
We showed up in Kansas City to surprise my dad for his 70th birthday in February.
We drove to Virginia for our honeymoon.
We detoured through Ohio on the way home to pick up my first Singer Sewing Machine.
We popped over to New Orleans for a holiday party.
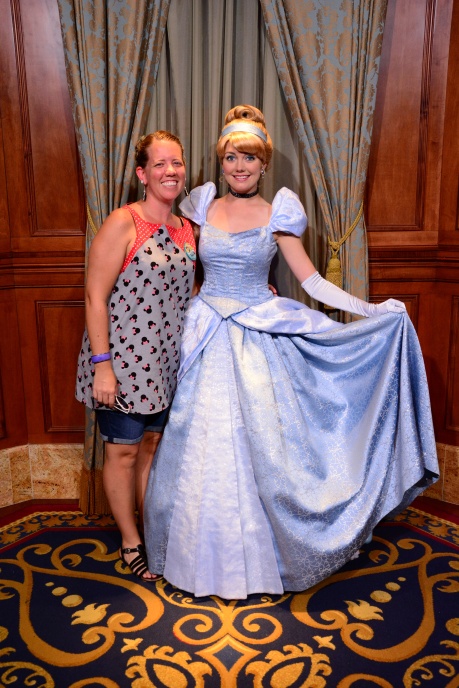
We spent an astronomical amount of time at Disney. We rode many rides.We met loads of princesses.
I ran a lot. Six hundred miles to be exact. With a team, I ran 2,016 miles this year. I completed 6 virtual runs with Hogwarts Running Club. I also ran a half marathon, two 10k’s, and a fair few 5k’s. I haven’t done very well at keeping track.
I painted a room in our house in the dark. Then painted 120 frames blue and hung them on the newly painted wall.
I made a few dresses and diaper bags. This was my favourite.
I crafted a few cakes. This little guy turned out great!
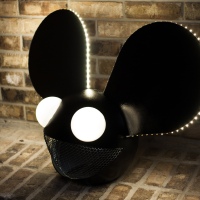
My husband made this string of lights for our Halloween party.
Overall, we had a good year full of fun and adventure.
Wishing everyone a great start to a new year. Give your family hugs and spend some quality time with them today. Take some time to remember the good of the last year and wish for something better for this coming year. Make a resolution or two (or not). Make something, eat something, and enjoy your day!
Sean here again, with another Halloween related project. Better late than never…
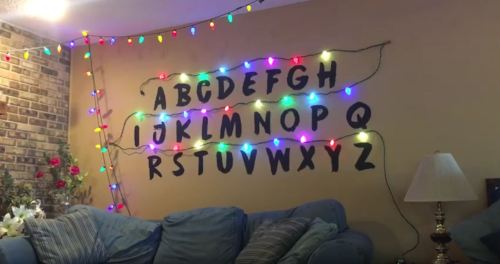
One of our good friends has a big Halloween party every year, and unfortunately they couldn’t have the party at their house this year for of a variety of reasons. We offered to instead have their party at our place, and of course we would need to do some decorating for a big party. Since we’re all fans of the show Stranger Things, I decided that recreating “the wall” that Will uses to communicate from the Upside Down would be a fun decoration for the party, in addition to being a fun exercise. We’re really happy with the way that it turned out and since I’ve had a few people ask for details, here’s a quick run through of how I accomplished it.
Here’s what it looks like in action… you’ll see that we included a bunch of memes and things to make people laugh. The program is fully customizable, and pretty easy to use once it’s set up.
Here’s what you would need to do it yourself:
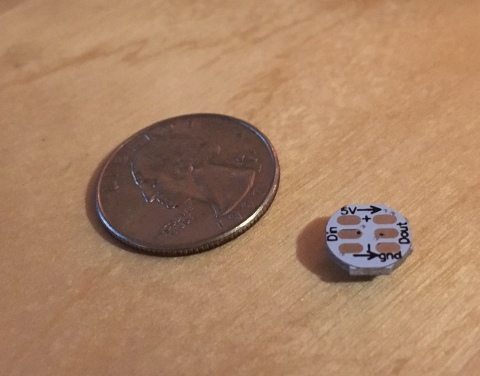
a good supply of WS2812 RGB LED lights (at least 26, of course, but you may need more unless you solder for a living). Here’s a set of 30 on Amazon though as an alternative you could also get Neopixels through Adafruit.
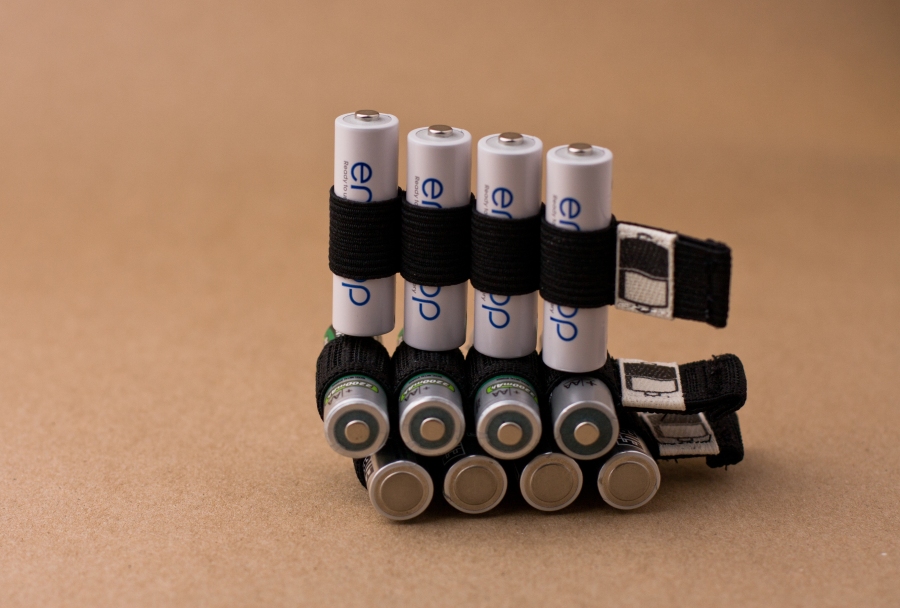
An Arduino (I used an Arduino Uno starter kit from Adafruit). Adafruit Link
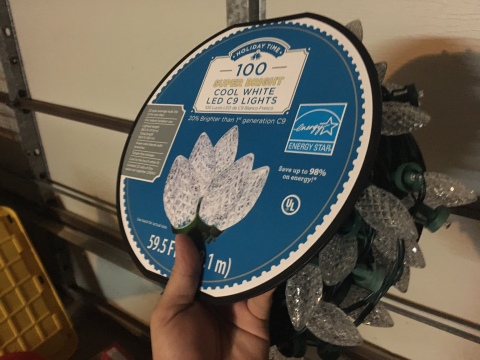
A string of Christmas lights with screw-off C9 bulb covers (we bought a string at Walmart).
26 water bottle caps (hope you’re thirsty!)
Arduino Software (for programming the Arduino). Software Link
Soldering supplies (a good soldering iron, solder, wire cutters, cleanup stuff, etc).
A hot glue gun and a handful of glue sticks.
I recommend having extra LEDs on hand because the soldering pads on them are tiny, and unless you’re much better at soldering than I am, you’re going to have some mistakes. I broke the soldering pad on three different LEDs while making this strand of 26 lights, so it was good that I had a few extras on hand. There are six different pads that have to be soldered on each LED, two for power and one for signal, both in and out.
There are loads of tutorials on how to use these LEDs on the Internet, I highly recommend checking out the information that is available in the Adafruit NeoPixel Uberguide. I wouldn’t have been able to do this without that guide.
Setting up the Arduino is simple.
See? Nothing to it.
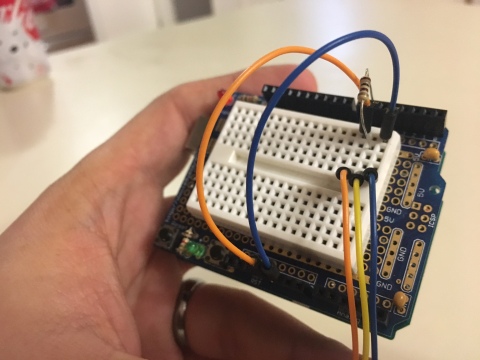
Okay, a little bit of explanation might help. The Arduino starter kit also comes with a Proto Shield for rapid circuit prototyping , and also includes a cute little breadboard. I followed Adafruit’s instructions on setting up the prototyping board, plugged it into the Arduino Uno, and then set up a quick circuit following the instructions in the NeoPixel Uberguide mentioned earlier. Essentially, we have power coming from the +5v pin via the orange wire, ground coming from a ground pin via the blue wire, and the #6 pin is connected to the breadboard with a 100ohm resistor (to help protect the first pixel in the strand, this should have been a 470ohm, but it’s what I had on hand). The strand of lights would then connect to the breadboard using the three wires that extend out of the bottom of the picture. Orange “+”, Blue “-“, Yellow “signal”. There were some other things that I set up while testing, but this was ultimately what was used.
Having the Arduino starter kit was a huge help, because it came with extra resistors, switches, LEDs, etc that were handy to play around with while I was learning how to make this work.
Now, on to the process of building things…
There are three different “runs” of Christmas lights, one for each row on the wall. On each of these runs I used 20″ lengths of wire at the ends, and between each light there are roughly 10″ lengths of wire.
I started with three 20″ pieces of green wire, soldered those to the input pads on the first LED, then three 10″ pieces of green wire on the output pads of the LED. I would continue with roughly 10″ lengths between each LED until the end of each “run”, where I would use a 20″ length again. After soldering the wires on the input side I would test the LED by plugging the leads into my Arduino which was loaded with the Strandtest sketch that comes with the Arduino software. If the light tested good, I would move on to the next step and solder the output wires, then test again. After I had the inputs and outputs of one light finished, I would move on to the next light and solder the input wires on the next light, then test again. If that step tested good I would then build the enclosure around the first light.
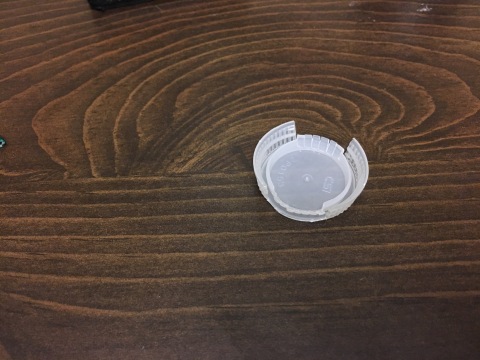
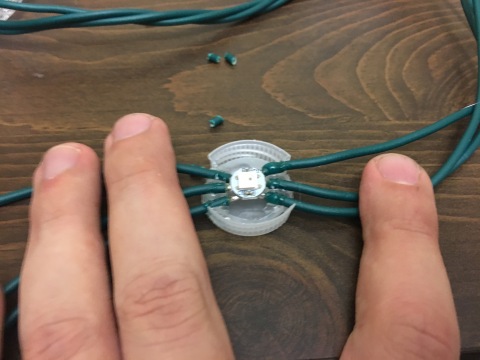
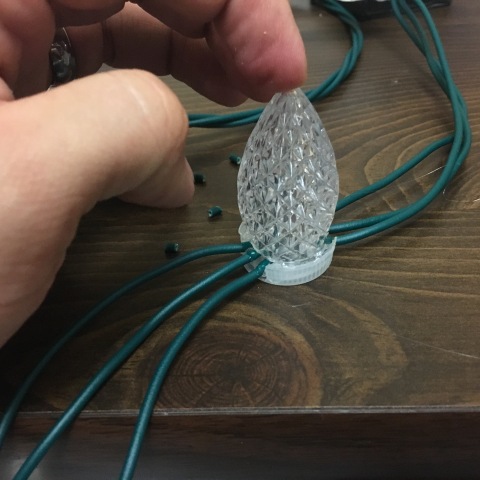
The enclosure for each LED required a modified water bottle cap…
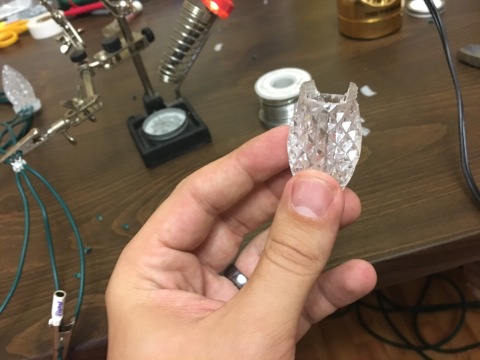
…and a modified C9 bulb from a sacrificial string of Christmas lights.
The water bottle cap was cut up a bit using a pair of side cutters, and the C9 bulb had a channel cut out of it using my trusty Dremel, to allow room for the wires once it was put together. I would very gently press the LED into the bottle cap, squirt some hot glue in around each wire, then press the C9 bulb into place and run glue around the outside edge.
After letting that cool down, I would then plug everything back in and test again. If everything still worked at that point, I was satisfied that it would be pretty sturdy. Once the hot glue set up there was nothing I would be able to do to get them back apart, so I was really careful about testing at each and every step.
So far so good.
After the lights were all buttoned up I gave the wires a bit of a twist, so that they would look like old Christmas lights.
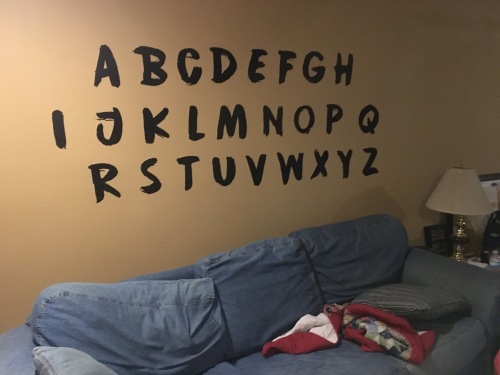
The letters are from the Cinnabar Brush font, and were cut out of black construction paper using our Silhouette, and then glued to the wall using a bit of rubber cement.
The code that runs everything was put together using some examples that I found online, and is probably more complicated than it could have been. My main prerequisite was that I wanted the lights to look like an old strand of Christmas lights. Even though each pixel was capable of being any color, I wanted A to always be red, B to always be yellow, and so on. This required that I manually enter the colors for the different functions that would run each portion of the show. I also wanted to make it easy to program individual phrases into the show, so I made a single function for each letter, that would be used to spell out each phrase. I made a couple of functions to do fun things like chase the lights from beginning to end, end to beginning, and a couple of different flashing and wipe functions. All of these are called from the main loop() during the show.
If you’re looking at the code, you might notice that the numbering associated with each letter looks weird. Each pixel is called using a number between 0 and 25, and the order of the letters in the strand do not directly correspond with A=1, B=2,etc. That is because my strand actually starts at the letter Z (pixel 0) because I powered it from that end, and then at the letter R (pixel 8) the wire connects to letter I (pixel 9) and then counts up to the letter Q (pixel 17) before hopping over to the letter H (pixel 18) and moving back down the alphabet to the letter A (pixel 25). It makes a bit more sense when you’re playing with it, just remember that if you reuse my code, the lights have to be wired the same as mine in the photos and video.
The code used for our show is available for download here.
To finish up the look, I hung up a bunch of normal Christmas lights all over the living room, and left it running during the party.
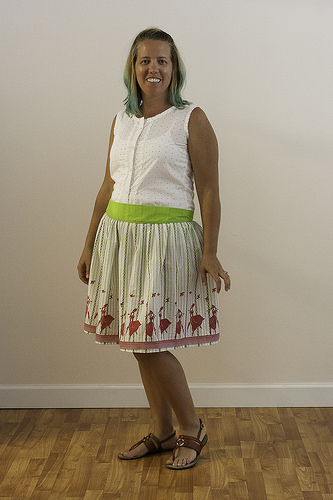
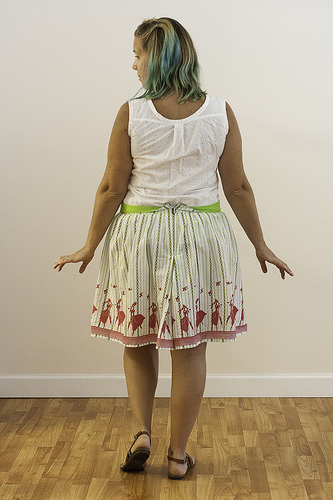
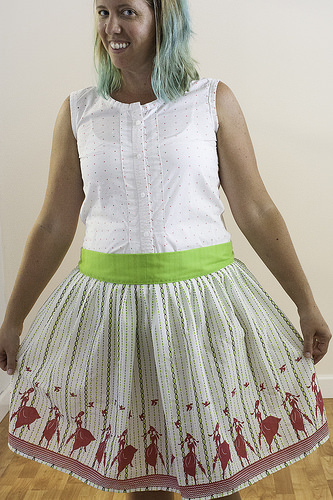
This is another of my Phoenix fabric finds. I immediately fell in love with this fabric. The colours are wonderful and the dancing-girls along the bottom make me smile. I knew immediately which skirt I wanted to make with the fabric. I love when fabric and pattern inspiration hit simultaneously.
Sew What Club had just begun and one of the bonus patterns was the taking notes skirt. I had been in love with the skirt for some time and was excited to finally make the skirt. The skirt was fairly simple to make. I only used the pattern pieces for the waistband. The skirt itself is a rectangle, so I just used my own dimensions.
I had added a little extra length to the waistband because according to the pattern directions, I needed a little more length. In the end, I ended up not needing the extra length. Rather than pull out all of the seams, I folded the excess into extra pleats under the zipper. The skirt has a cute little kick pleat of sorts.
I will admit I’m not completely happy with the skirt. The waistband fits funny. No matter where I adjusted the skirt to rest, the waistband would just stand around my torso leaving a gap between me and the skirt. Though I think that has to do more with my measurements than the pattern. I don’t think this skirt works well with those that don’t have flat stomachs (I guess that’s my motivation to work on my abs a bit). Since I couldn’t get the fit just right, I didn’t go back to add the ties. I compromised on the fit by folding down the waistband to expose my awesome lime green lining.
I have plenty of this fabric left. I will probably attempt another skirt in the near future. As soon as I decide which one.
The top modeled is a button down top that I altered to be sleeveless. I removed the collar. I also added tuxedo pleats down the front.
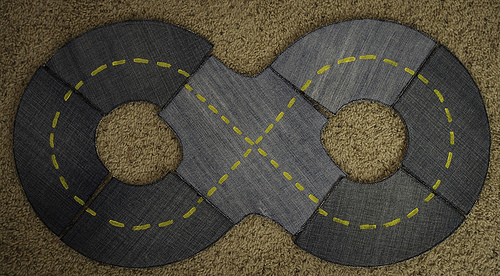
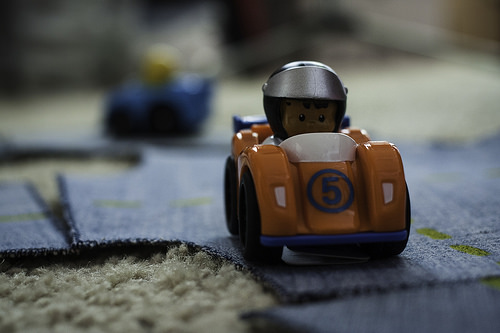
I have some of the most darling little nephews. One of them happened to turn two recently. I stumbled across this project shortly after he was born and I’ve been anxiously waiting for him to get old enough to actually play with them.
Thankfully, we’ve been on a cleaning spree and I had a handful of my husband’s jeans available to be chopped into road sized pieces. A quick trip to Wal-mart provided a roll of kitchen drawer liner. I had mod podge and yellow paint on hand.
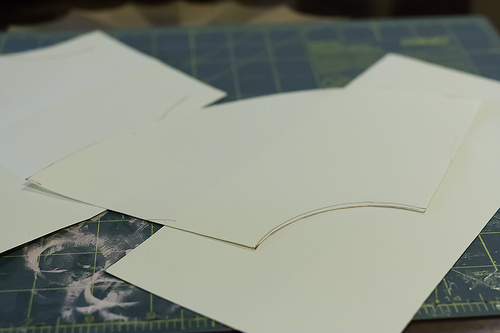
To begin, I created pattern pieces for the 4 shapes I wanted to make.
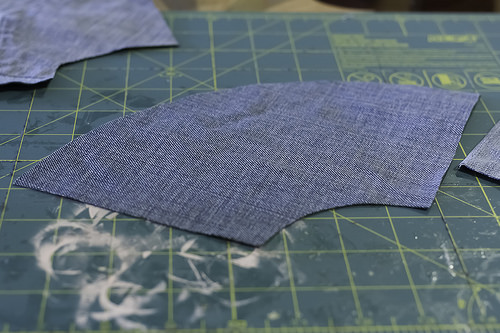
Using the patterns, I traced and cut out road pieces from 2 pairs of jeans and the kitchen drawer liner. Making certain that I had the same pieces cut from both materials.
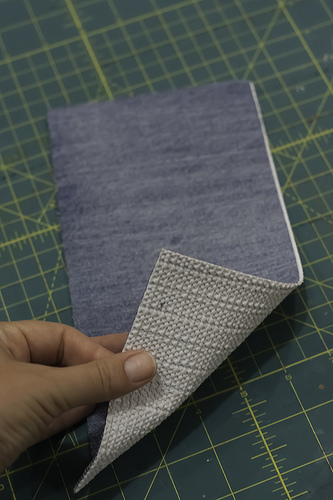
To join the jeans and liner, I spread mod podge on the liner and carefully placed the denim pieces over the liner.
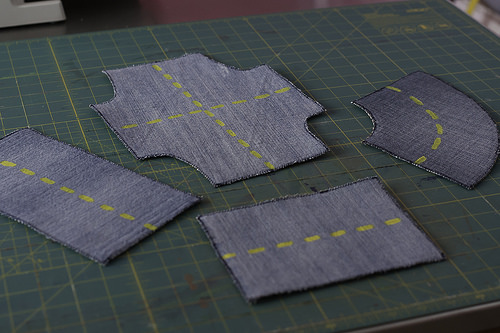
For added durability, I zigzag stitched around the outside of each road piece. The original tutorial used hot glue to secure the edges. I couldn’t find my glue gun or I would have tried that method too.
Finally, I painted yellow lines down the center of each piece.
Of course, I couldn’t send it off without testing it.
While I haven’t had the opportunity to hit the fabric districts of LA or New York, I’ve discovered a couple of shops in Phoenix that fit the bill. Sadly, I don’t live in Phoenix, so I tend to go a little crazy when I get the opportunity to visit.
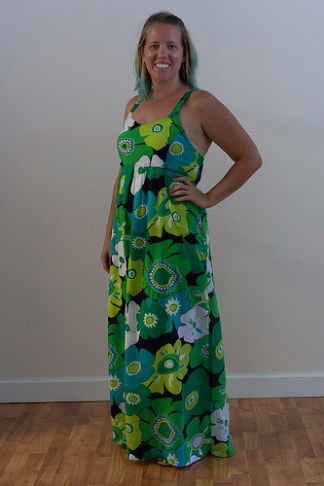
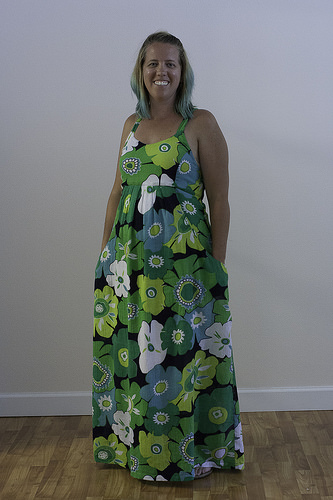
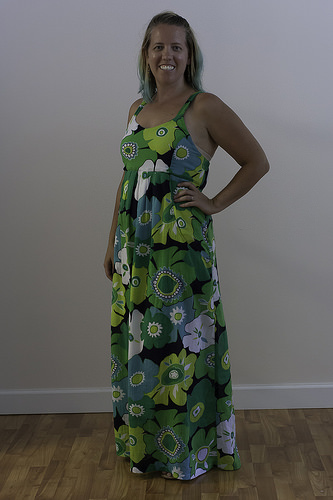
I dug this marvelous fabric from one of the many piles of fabrics on my last visit. It’s a crinkly gauzey fabric. It is very lightweight. And quite soft.
It also reminds me of a sheet my mom had while I was growing up. It was ginormous! We used it for making tents in our bedrooms. I swear, our tent creations would put any Harry Potter tent to shame.
It took some time to find the perfect pattern for the fabric. I choose the fabric with some idea in mind and then change my plan about 800 times before making the final decision. For this particular fabric, I used Simplicity pattern 1800. It is one of their Amazing Fit patterns. This means, there are alternate pattern pieces to use based on your measurements. In theory, you shouldn’t have to make a bust adjustment, they already have. Since I conveniently fall into the average category, I don’t know how well that theory works.
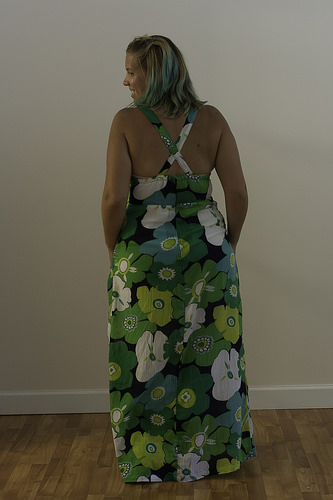
My one alteration to the pattern was to change the straps from a halter that tied behind the neck to straps that crossed in the back.
I think the best part of the dress are the pockets. I firmly believe all dresses should have pockets.
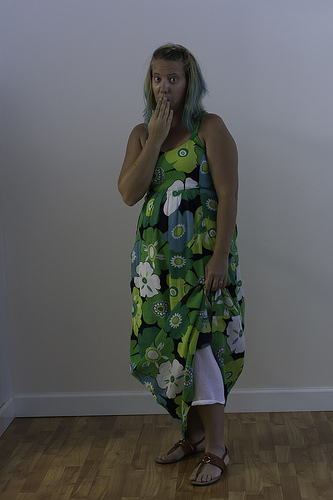
Despite the dark colours of the fabric, it is quite thin and nearly see through. I decided to add a lining skirt for a bit of modesty. My initial plan was a navy lining, but could not find a suitable navy fabric. I went with white instead. Which I think turned out for the better since a navy lining would have shown through the white flowers.
I have already had the opportunity to wear this dress a few times. Despite its length, the dress is cool to wear in the oppressive summer heat of Florida. Yet, it also manages to keep me warm in the arctic of movie theaters.
I have worn glasses (and contacts) for the majority of my life. I chose my first pair in second grade and have been wearing them ever since. They were a horrible, ugly pair of plastic oversized frames that nearly covered my face. Well, maybe not quite that large, but they were ugly and plastic. The late 80’s were not kind to glasses wearers.
Thankfully, my mom took pity on me and let me start wearing contacts a few years later. I was so relieved to not have glasses on my face. Except sunglasses, I love wearing sunglasses.
In the last few years, I have grown to despise my contacts nearly as much as those awful glasses. After much thought and reading, I took the plunge this summer and convinced myself to get LASIK (Technically PRK, which is LASIK without the flap). Eek!
The procedure itself wasn’t terrible. I’m sure there are more terrifying operations to go through. I’ve not experienced them, so I’m only guessing.
What I didn’t expect was how long the recovery is taking. I was functioning mostly normally within 3 days with the exception of driving, reading, using a computer, being outside, watching TV, sewing, and baking. So essentially everything I do to keep occupied.
Clarity has slowly been making itself known. Every day, I realise I’ve just done something for the first time without the aid of glasses or without squinting. About the only time my eyes feel squinty is when working on my computer (thus the lack of posts) and outside in bright sunlight.
Overall, it has been a good experience and I’m glad to have done it. I also hope that I never have to go through the process again.
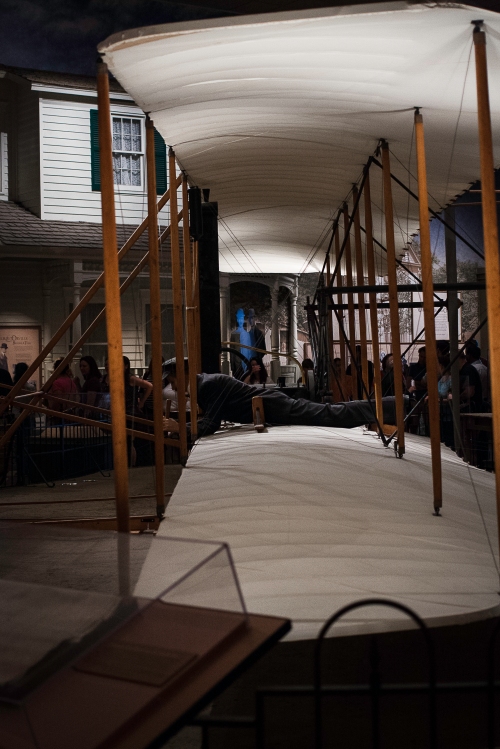
Despite the lack of sight, I have been busy with projects and am working on share them with you. Today, you get photos from Monticello during our honeymoon.
When we bought our house 3 years ago, we knew we wanted to turn one wall into a photo wall. We quickly decided to use our long hallway wall. And that’s the only portion of the project we’ve done quickly!
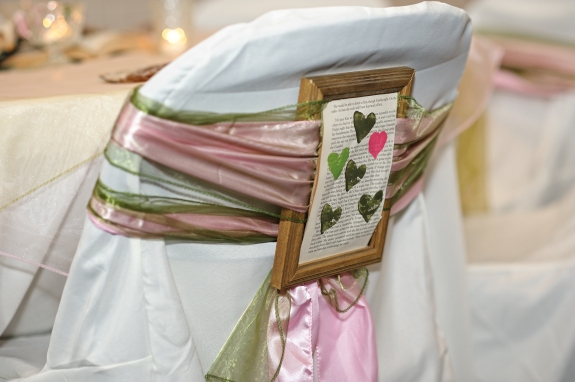
When planning our wedding, we came across a chair decoration in a wedding DIY project from Hobby Lobby (sadly, I don’t have a link to that image). We took a 5×7 frame, a painted book page, and a couple of chair sashes to create the chair decorations. Thankfully, Candi, our wedding photographer took a photo, because I never had the opportunity.
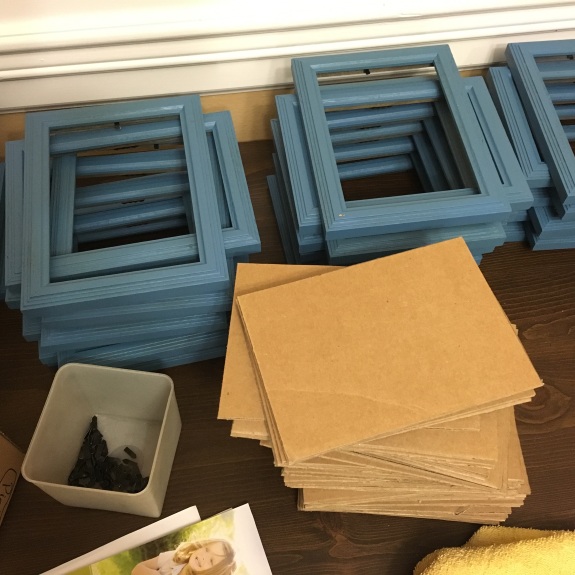
Since we now had 120 frames that were exactly the same size, we had a start for our photo wall. Except that the frames were the wrong colour. As was the wall. I finally took time to paint our front room and hallway over spring break. My husband started painting the frames. He tried several options before settling on spray painting with an air compressor.
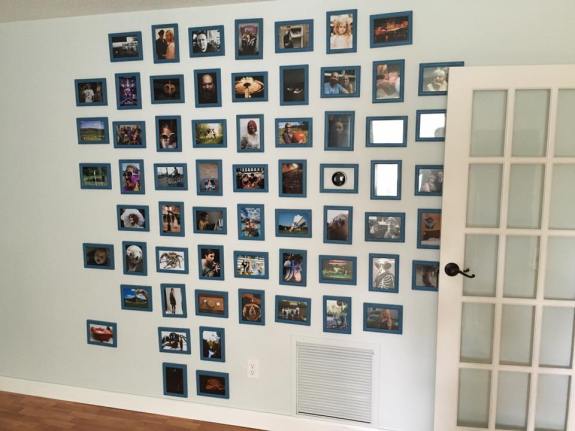
To make sure all of the frames would fit on the wall, my husband created a grid on the wall beginning with the nest. He also devised a contraption to make certain the hangers were placed in the exact same place on each frame.
We have now framed and hung about half of the photos and are quite pleased with the results. For the most part, these are all photos we have taken. We will eventually have a few taken by others, but are making sure we have permission from the photographers.
As I mentioned last weekend, we are newly back from our honeymoon. Yes, we did get married nearly 2 years ago, don’t judge, life happens.
We had the pleasure of staying at Massanutten Resort in Virginia. I highly recommend staying there. The staff was always helpful. There were loads of activities. It is probably possible to check in and never leave resort property (unless on a resort field trip) for a week and still not run out of things to do. We only took advantage of the art classes and tried a couple of restaurants; we opted to explore the surrounding area. That didn’t disappoint either.
Our first adventure took us to Luray Caverns. It’s a little on the spendy side of the numerous caverns, but its extras are worth the price. The caverns were amazing. I’d never seen so many stalactites and stalagmites in one place. The guides were a wealth of information as well. Included in the price were a couple of museums; both of which were entertaining.
During the initial drive to the resort and while heading to the caverns, we kept seeing signs for a Skyline Drive. We learned it is a scenic highway through the Shenandoah National Park. The Skyline Drive is around 100 miles long. We tackled the middle bit. The drive includes 75 scenic views and marvelous twisty roads climbing through the mountains.
The pass you purchase to enter the park is valid for a week. We headed back the next day to scout out a waterfall or two. We opted to find the tallest waterfall. We ended up hiking about 8 miles to find this 92 foot high waterfall. It wasn’t a terrible hike, but we weren’t super impressed with the waterfall. It was more of a water trickle.
One of our main reasons for choosing this resort, was its closeness to Washington DC. It was a place we hadn’t visited together. We took one day to drive near the city and then use public transportation to travel through the city. We left at 5am to hopefully avoid the terrible traffic. Our timing worked out fairly well along with the ability to use the HOV lane.
It was bigger than expected.
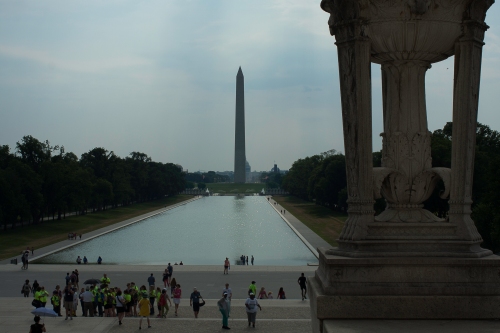
Our early arrival allowed us to check out the Washington, Lincoln, WWII, Vietnam War, and Korean War memorials before the Smithsonian Museums opened for the day. We also caught a glimpse of the White House.
View from the Lincoln Memorial
Our goal was three of the 13 Smithsonian Museums. We began with the Air and Space Museum. It did not disappoint. I finally got to see the Spirit of St. Louis! Sadly, we missed seeing the USS Enterprise by a few days.
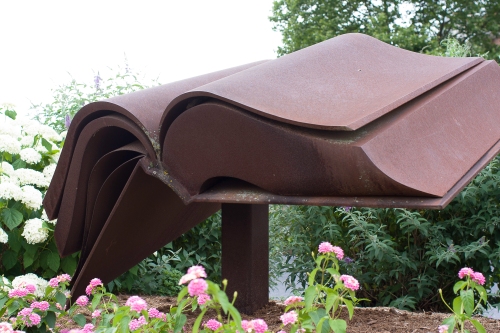
Our second museum for the day was the Natural History Museum. On our walk between museums, we strolled through the Sculpture Garden. The Natural History Museum was educational.
We decided to take a break from museums and see the White House. Unfortunately, on our trek back to the museums, we got caught in a massive downpour and decided that we were done for the day. We didn’t make it to our third museum. I have a feeling we will be visiting Washington DC again and staying a little closer to explore our nation’s capital in more depth.
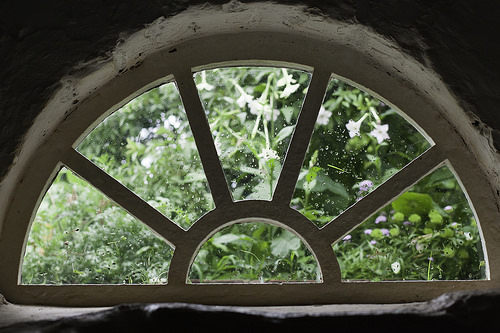
I somehow stumbled across a glorious find in a nearby town. We went off to explore a camera museum and a church with some amazing stained glass windows. Both were fairly impressive. I now wish I had taken photos in the camera museum, but I didn’t. The town also had some fun art instalations around town. This one was in front of the library.
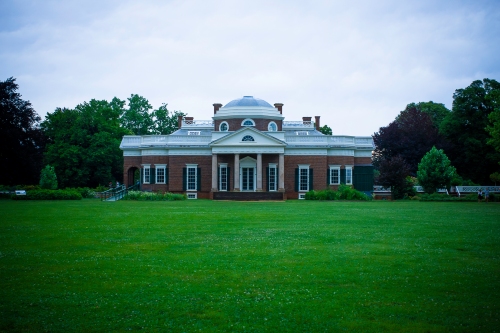
Our last big adventure for the trip was to visit Monticello. I love visiting historic home and seeing how people lived. I’m always a little jealous of the gorgeous homes until I remember the toilets are outside and showers weren’t a daily habit. Not to mention the lack of electricity. Thomas Jefferson’s home and grounds were enjoyable. Unfortunately, a thunderstorm rolled in and the outside tours were cancelled for the afternoon. A light drizzle doesn’t bother us much and we still tramped all around the grounds.